Yesterday morning I attended a Japanese Vegetarian Cooking Workshop by Junko Hamilton at The Heritage Community Garden in Donnybrook. I mean, how could I resist this? Delicious homemade veggie Japanese food, using some of the produce from a fantastic organic urban garden! Just amazing. A really nice group of people showed up to learn from Junko, some of whom had never tried making Japanese food themselves, some that had but wanted to learn more, serious foodies, veggies and non-veggies alike!
Junko started off by explaining the importance of Umami in Japanese cooking. It's the 5th taste that our tongue senses after sweet, sour, bitter and salty and it's what makes Japanese food taste so good. Junko then showed us 2 basics recipes that we can add to any dish for an authentic Japanese taste, her "Mammy" sauce and homemade Kombu Dashi (seaweed water or stock). These were then used in a variety of sauces and dressings that we would have later on for our lunch.
We took a break then from the kitchen and were shown around the beautiful sunny garden by Jean Burtchaell, the head gardener, along with Kevin Corr. The Victorian garden was left idle until about a year a ago when Jean and Kevin took it on and transformed it in an amazing organic urban farm. The amount they've done in a year is staggering, growing amazing fruits and veggies like: berries, apples, pears, rhubarb, a huge variety of salad leaves, wild flowers, kales, kohl rabi, courgettes, aubergines, carrots, pumpkins, tomatoes, onions, corn, chards, cabbages, beans and peas, herbs, komatsuna, leaf beat, pak choi...I could go on and on! It's just amazing. We harvested some lovely yellow corgettes, purpley-pink kohl rabi, a few carrots and a big head of pak choi and headed back into the kitchen. 1
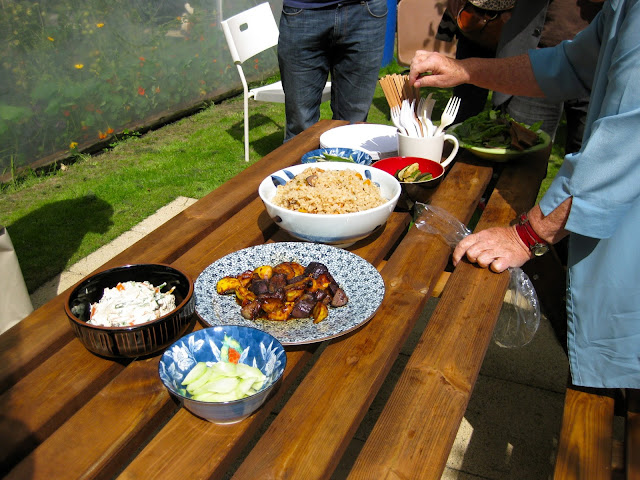
Junko then showed us 4 dishes using all of the gorgeous produce including Shira-ae (a delicious fresh tofu and vegetable dish), Tikikomi-Gohan (a Japanese style pilaf), Umezu picked kohl rabi and aubergine and courgette with sweet miso paste. The sauces made earlier were also used to dress tender vegetables and salads. We took all the delicious food back out into the garden and enjoyed it around the picnic table chatting and enjoying the sunshine.


I would highly recommend Junko's workshop, she was a wonderful teacher and it was a really relaxed and enjoyable afternoon. The food was just incredible, everybody went back for seconds and we all were excited to make the dishes at home ourselves.
Junko is hosting another Japanese Vegetarian Workshop at her home in Blackrock on Thursday 22nd of August from 5.30pm-8.30pm. If you'd be interested in learning more about fantastic homemade Japanese food, go to her Facebook page for more details on this soon.
Also to find out more about The Heritage Community Garden go to their Facebook page too.
Junko started off by explaining the importance of Umami in Japanese cooking. It's the 5th taste that our tongue senses after sweet, sour, bitter and salty and it's what makes Japanese food taste so good. Junko then showed us 2 basics recipes that we can add to any dish for an authentic Japanese taste, her "Mammy" sauce and homemade Kombu Dashi (seaweed water or stock). These were then used in a variety of sauces and dressings that we would have later on for our lunch.
We took a break then from the kitchen and were shown around the beautiful sunny garden by Jean Burtchaell, the head gardener, along with Kevin Corr. The Victorian garden was left idle until about a year a ago when Jean and Kevin took it on and transformed it in an amazing organic urban farm. The amount they've done in a year is staggering, growing amazing fruits and veggies like: berries, apples, pears, rhubarb, a huge variety of salad leaves, wild flowers, kales, kohl rabi, courgettes, aubergines, carrots, pumpkins, tomatoes, onions, corn, chards, cabbages, beans and peas, herbs, komatsuna, leaf beat, pak choi...I could go on and on! It's just amazing. We harvested some lovely yellow corgettes, purpley-pink kohl rabi, a few carrots and a big head of pak choi and headed back into the kitchen. 1
Junko then showed us 4 dishes using all of the gorgeous produce including Shira-ae (a delicious fresh tofu and vegetable dish), Tikikomi-Gohan (a Japanese style pilaf), Umezu picked kohl rabi and aubergine and courgette with sweet miso paste. The sauces made earlier were also used to dress tender vegetables and salads. We took all the delicious food back out into the garden and enjoyed it around the picnic table chatting and enjoying the sunshine.


I would highly recommend Junko's workshop, she was a wonderful teacher and it was a really relaxed and enjoyable afternoon. The food was just incredible, everybody went back for seconds and we all were excited to make the dishes at home ourselves.
Junko is hosting another Japanese Vegetarian Workshop at her home in Blackrock on Thursday 22nd of August from 5.30pm-8.30pm. If you'd be interested in learning more about fantastic homemade Japanese food, go to her Facebook page for more details on this soon.
Also to find out more about The Heritage Community Garden go to their Facebook page too.


